How to make paper flowers

A team of flower, style and design experts and enthusiasts. We love sharing advice on all things floral and offering top tips on expressing yourself and your emotions.
A team of flower, style and design experts and enthusiasts. We love sharing advice on all things floral and offering top tips on expressing yourself and your emotions.
We’re obviously big fans of fresh florals but sometimes you want the satisfaction of making something beautiful with your own hands that stands the test of time.
That’s where paper flowers come in. From tissue to card to sheet music from a special memory, there’s no end to where your creativity can lead you. Plus, you can always feature your elegant papery blooms alongside real flowers for a dramatic effect.
Want to learn how to make paper flowers yourself? We’ve searched high and low for the very best tutorials and inspiration to get you started.
How to make paper flowers
You will need:
- Paper – Choose whichever kind works for the finish you’re looking to achieve. Tissue paper creates puffy, delicate paper blooms or you can use card to create crisp, sharp origami bouquets.
- Scissors – There’ll be plenty of cutting required!
- Glue – Sometimes, your flowers need a little help keeping it together – maybe we could use some glue too! We recommend a hot glue gun that’s easy to use and super sticky but if you can’t get your hands on one of these clear craft glue works just as well.
- Craft wire – Create stems or add a little additional structure to petals and leaves with this handy craft material.
- Ruler – Sometimes, these tutorials call for precision.
- Florist tape – This sticky green tape can help you hide a multitude of sins in any handmade craft, ideal if you’re a beginner.
- Thread or fishing line – Secure your flowers with this, ready for hanging.
What paper is best for paper flowers?
There are so many options when it comes to the type of paper you can use to make flowers. Here are just some of our favourites:
Card paper
Crisp and stiff card paper allows you to create strong blooms that look great on stems, arranged in a vase.
Best for: Roses, daffodils, hyacinths, hydrangeas, tulips.
Tissue paper
This paper creates fluffy, soft flowers that look impressive when grouped together on a flower wall.
Best for: Chrysanthemums, peonies, carnations.
Crepe paper
Similar to tissue paper, crepe paper creates delicate paper flowers and works great for oversized designs.
Best for: Daisies, carnations, roses, anemones.
Newspaper
Reuse and recycle that Sunday newspaper to make elegant paper flowers.
Best for: Roses, anemones, poppies.
Sheet music
Create flowers for that first wedding anniversary using the sheet music from your first dance song.
Best for: Roses.
Book pages
We know, ripping pages from books is a sin amongst book worms but it will be worth it when you make your paper flowers.
Best for: Roses, tulips.
Toilet paper or paper napkins
While many of us may hoard this rolled up gold after the year 2020, it can be used to create paper flowers if you can’t get out to the craft shop. When you gotta craft, you gotta craft.
Best for: Bud roses.
Ready to go? Okay! Here are some tutorials to try out for yourself.
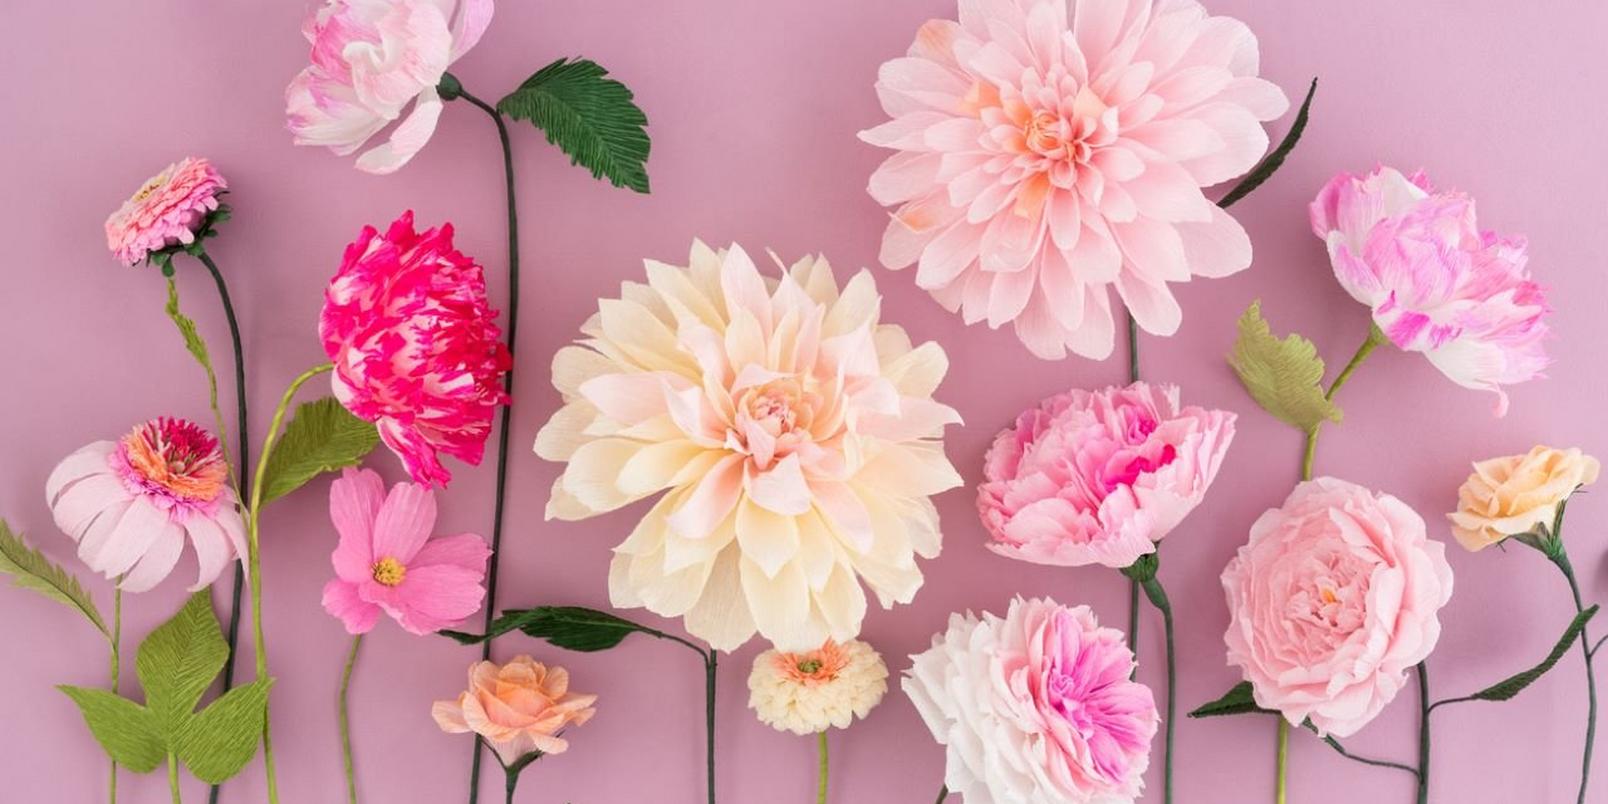
How to make tissue paper flowers
Tissue paper flowers can help you create a dramatic finish on a flower wall or a table arrangement. We love oversized, crepe paper flowers with ruffled petals and in soft pastel shades.
What flowers is tissue paper best for?
- Carnations
- Roses
- Dahlias
- Chrysanthemums
Follow the steps in this tutorial by Create With Pennies Not Perfection that walks you through the process of making stunning tissue paper flowers.
Step 1 - Start by cutting your tissue paper into rectangle shapes. Try out different sized rectangles for texture in your final creation. Hey, not all flowers are made the same!
Step 2 - Take five sheets of rectangular tissue paper and stack them neatly together.
Step 3 - Then, starting at the end, fold the pieces of tissue paper accordion style. This means it’s time to flip and fold, flip and fold.
Step 4 - Take some fishing line and tie this around the middle of the folded paper.
Step 5 - Grab some scissors and cut the ends of the tissue paper into curved shapes.
Step 6 - Start to peel your pieces of paper apart to create your flower shape! Gently pull the tissue into the middle on each side and soon it will start to look like petals. Magic.
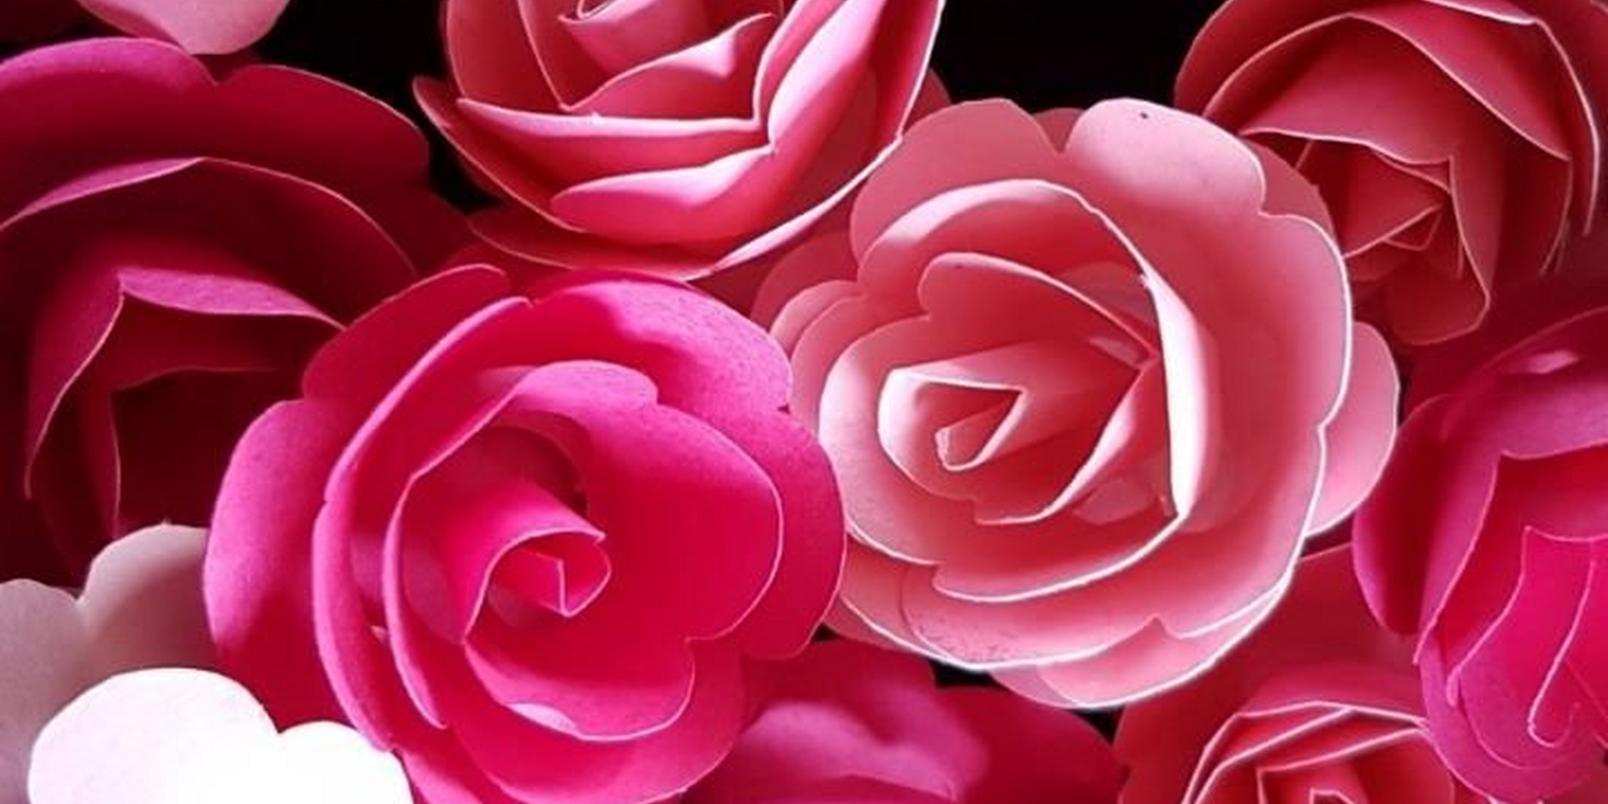
How to make paper roses
Go hard or go home they say and with this tutorial from Sweet Red Poppy, you certainly won’t be leaving the party early. Create giant paper roses that make an impression whatever the occasion, we love the idea of featuring these along a wall behind a present table at a baby shower or family party.
This tutorial makes oversized roses, but you can easily make your petals smaller to suit your needs. Follow these steps and give it a go.
Step 1 - Start by prepping a back board. This tutorial uses a cardboard cake board but you could just use a circle cut from a cardboard box. We’re all about recycling!
Step 2 - Cut out some petal templates using scrap cardboard. You’ll need 8-10 large petals, 8-10 mid-sized petals and 16 small petals to create the centre bud of the rose.
(You can download these petal shapes from the tutorial or draw your own. They need to taper towards the middle, creating a sort of tab that will be used to stick each petal down.)
Step 3 - Use your templates to cut out your petals from your chosen card.
Step 4 - Once you have all your petals, it’s time to make them look a little more realistic. Take the edges and gently wrap them around a rolling pin or a piece of dowel, to create curved ends.
Step 5 - Now it’s time to get the glue gun out! Take your cake board and stick your large petals around the outside of the board before moving onto the mid-sized petals, building them up. Soon it will start to look like a big flower.
Step 6 - Next, you need to make the bud that will sit in the centre of your rose. Take two of those small petals you cut out earlier and stick them together by their tabs. Then carefully bend them into one another and add a dab of glue at the top to create an almost pyramid-like shape.
Step 7 - Take another two petals, stick these together then stick your pyramid shape on top. Pull the petals up and glue these at the top to add to your bud. Continue doing this with your other cut petals and you’ll have a neat bud that can be nestled in amongst the flower you made earlier to create its centre.
Whew! Those were a fair few steps to follow. Check out the tutorial in full and have fun making these oversized paper blooms.
How to make roses using a paper napkin
Have a load of unused napkins in your home and feel the urge to craft? Here’s a quick tutorial on how to make delicate budded roses that you can enjoy long after:
- You will need:
- Paper napkins
- Scissors
- Paint
- Wood skewers
- Green string
Step 1 - Cut your napkin into long rectangular strips.
Step 2 - Take these strips and wrap each one around the end of a wooden skewer, building up layers to create petals.
Step 3 - Take your green string and tightly wrap this around the bottom of your napkins, securing them to the wooden skewer.
Step 4 - Gently paint the tissue any colour you like – try to avoid getting it too wet, we recommend using acrylic paint – leave it to dry, then enjoy!
What can paper flowers be used for?
Wondering what to do with all those paper flowers you’ve now made? We have some ideas:
- Decoration in your home – The easiest way to enjoy paper flowers is to feature them in a vase in your home or pop them in amongst a floral arrangement of real blooms.
- Party decorations – Skip the balloons and use paper flowers to make an impact at the next party you’re planning. Stick them to walls, line them up along tables or hang them from the ceiling.
- Gifts – Give your paper flowers to loved ones as gifts they’ll cherish forever more. They’re also ideal for those who have allergies – although we do offer lily-free bouquets.
- To preserve memories – A script from the first movie you saw together, your wedding vows or even a love letter can all be bent and shaped into flowers for the perfect, sentimental gift.
- Wreaths – Paper flowers look great in wreaths and last long after the season is over. Prefer a fresh flower wreath? Well, you could leave space in your design for fresh flowers each year that can be added once the relevant season rolls around.
We hope this guide has inspired you to whip out the hot glue gun and get crafting. After a couple of practice runs, you’ll be creating paper flowers for all occasions! Looking for more crafts with flowers? Check out our guides on how to dry and how to press flowers for more inspiration.